Fermentastic
Fermentastic Artisan Sourdough Starter Kit & Jar
Fermentastic Artisan Sourdough Starter Kit & Jar
Couldn't load pickup availability
Wake Up Ancient Magic in Your Own Kitchen
Did you know wild yeast cultures are practically immortal? Researchers successfully extracted ancient, cold-adapted yeast strains from a 5,000-year-old Alpine mummy — Ötzi the Iceman — feeding and reviving them into a fully functioning sourdough starter that baked a genuinely delicious loaf of bread!
While your Fermentastic starter isn't coming straight out of an ancient glacial tomb, it harnesses that exact same resilient, living magic. With our dried flakes, you're tapping into centuries of traditional baking history — right in your own kitchen.
What's in the Box
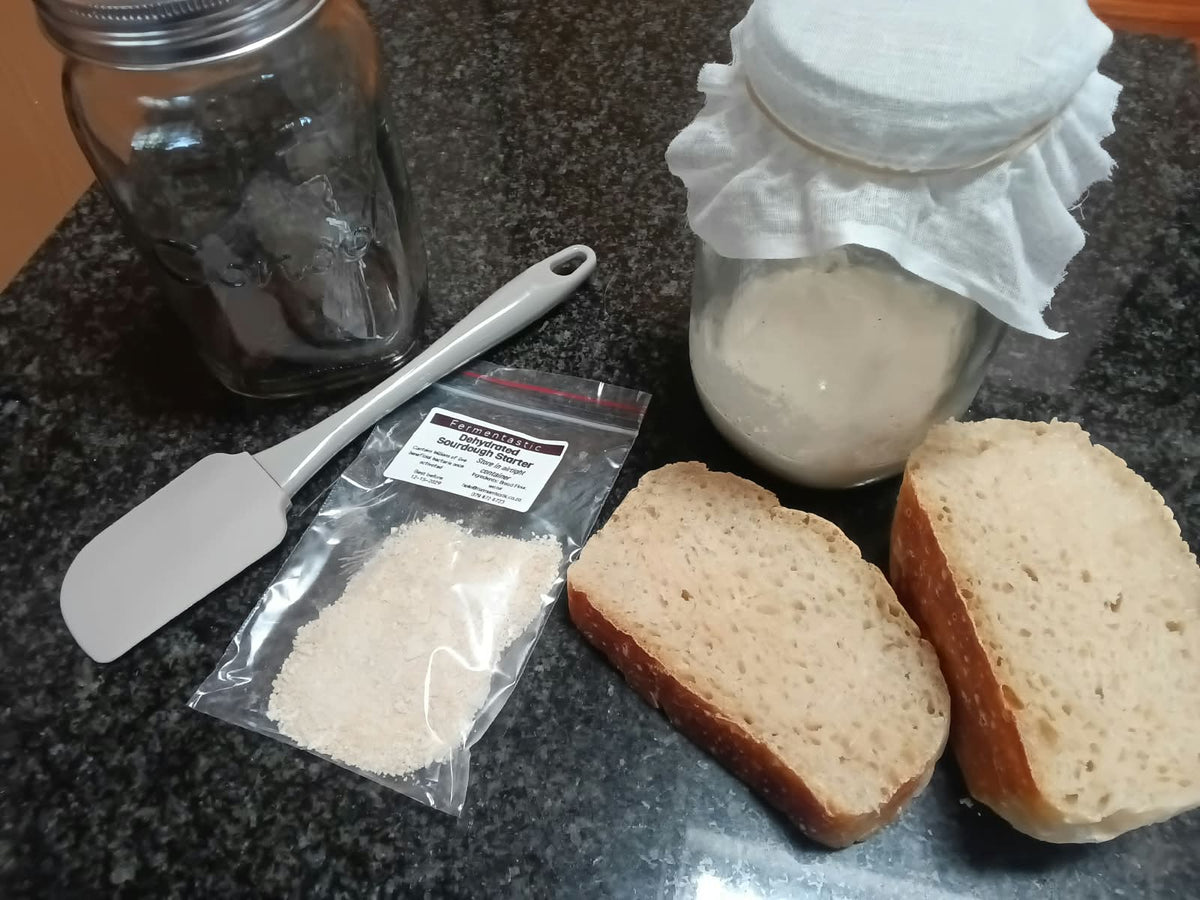
- 1 × 1L Wide-Mouth Glass Jar — complete with a secure lid for easy mixing and fermenting
- 1 × Premium Breathable Cheesecloth Cover with elastic band
- 1 × Full-Sized Kitchen Spatula — built for easy mixing and scraping
- 1 × Sealed Sachet — 20g Active Dried Sourdough Starter Flakes
- 1 × Quick-Start Guide Card — detailed step-by-step instructions included inside the parcel
Optional Add-on: Extra 20g Backup Starter Sachet available for R70 — add it to your cart separately.
How It Works — 3 Simple Feeds
Important tip: Watch your starter, not just the clock! Each feed is ready when your starter has at least doubled in size, looks domed or just starting to fall, and smells pleasantly tangy. This usually takes 12–24 hours — but don't wait if it's already peaked, or it will fall flat before the next feed.
Pro baker's trick: We've included an extra elastic band in your kit — put it to good use! After each feed, slide the elastic band around the jar at the level of your fresh mixture. As your starter rises you'll be able to see exactly how much it has grown at a glance. When it has doubled (or more!) above that band and is beautifully domed, it's time for the next feed. No guessing, no lifting the lid — just watch the band.
- Feed 1 (Day 1 — Morning, ~8am): Mix 15g dried starter + 15g flour + 30g water in your glass jar. Slide the elastic band to the level of the mixture. Cover loosely and leave to ferment. Check it after 12 hours — if it's doubled above the band and bubbly, move to Feed 2. Otherwise leave until it peaks (up to 24 hours).
- Feed 2: Take 30g of your active mixture (discard the rest) + add 30g flour + 30g water. Move the band to the new mixture level. Watch again — when it doubles and domes above the band, that's your cue for Feed 3.
- Feed 3: Take 30g, discard the rest, feed one last time with 30g flour + 30g water. Move the band again. When it doubles and passes the float test (drop a teaspoon in water — if it floats, it's ready!), your starter is alive and rearing to bake!
From Dough to Delicious: The Easy Baking Guide
You've fed your starter, mixed your ingredients, and let your dough rise until it's puffy and full of life. Now comes the best part: turning it into a crusty, golden artisan loaf. Don't worry if it feels a little sticky — here is a simple, stress-free method using everyday kitchen items.
Step 1: The Single Stretch-and-Fold
Before your dough starts its long rise, give it a quick boost of structure.
Wet your hands lightly with water so the dough doesn't stick to your fingers. Gently flip the dough out onto a clean, damp surface, stretch it out slightly into a square, fold the sides into the center like an envelope, and round it into a smooth ball. Pop it back into your bowl to finish rising.
Step 2: Shaping Your Loaf
Once your dough has expanded by about 75% and looks bubbly and aerated, gently tip it out onto your counter.
Round it loosely, let it rest for 10 minutes to relax, and then gently roll it into a neat log or round shape.
Step 3: Choosing Your Baking Dish (What You Have at Home)
You don't need fancy professional bakery equipment to get an incredible crust. You can use standard kitchen bakeware to trap steam:
- The Best Option: A heavy cast-iron pot, Dutch oven, or heavy Pyrex casserole dish with a matching lid. The lid traps the steam your bread naturally releases, giving you that brilliant, crackly bakery crust.
- The Alternative: If you only have a standard metal bread loaf pan, you can still use it! Just place your shaped dough inside it, and place a second inverted metal tray or foil tent over the top for the first half of baking to trap the steam.
Step 4: The Final Proof & Scoring
Place your shaped dough into your baking vessel (or a floured basket/bowl if doing an overnight fridge rest).
The Spray & Paint Trick: Right before it goes into the oven, you can lightly mist the top of the dough with a water spray bottle. (If you want a gorgeous golden-brown shine, you can also gently paint or brush the top with a tiny bit of water or milk.)
The Slit (Scoring): Take a sharp razor blade, craft knife, or very sharp kitchen scissors, and make a decisive, shallow slash across the top of the dough. This acts as a vent so your bread expands nicely instead of bursting at the sides.
Step 5: Baking to Perfection
Put the lid on your pot or cover your dish, and bake in a preheated hot oven (around 220°C) for about 20 minutes (this steams and bakes the inside).
Remove the lid, and bake for another 25 to 30 minutes uncovered until the crust turns a deep, golden-brown color.
Let it cool completely before slicing — it's hard to wait, but letting it cool finishes setting the crumb!
Want to Learn More?
Read our full guide: Why I Stopped Struggling With Sourdough Starters (And What I Do Instead) — includes the complete activation walkthrough, float test tips, and baking instructions.
Share